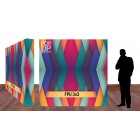
This guide will provide you with the knowledge required to assemble our BANNERAD™ Fabric PopUp wall displays - in this instance we'll be using one of our 2m x 3m Fabric PopUp displays to demonstrate this.
When you purchase a BANNERAD™ Fabric PopUp Wall from ADI Displays we will supply all that you need!
For each display there will be:
- 1 x carry case
- 1 x BANNERAD™ Fabric PopUp Wall unit
- 1 x dye sublimated fabric print (if print was ordered as part of our Value Added Service)

*Pictured above: BANNERAD™ Fabric PopUp Wall 4x3
|
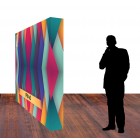
This guide will walk you through the entire assembly process. When you purchase a BANNERAD™ Fabric PopUp Wall unit from us we will pre-assemble the graphic to the unit for you before dispatch. The unit will arrive as it appears to the right, to erect it from this stage you can please follow steps 1, 2 and 9 only. |
 |
|
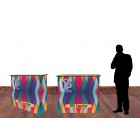
Step 1: Remove the unit from the carry case, take hold of two opposing corners and slowly push them outwards / away from the centre, the unit should easily slide open. *Note: Carpet - if you are assembling on carpet the velcro on the feet may grip, if this is the case expand the unit in the air before setting it back on the floor. |
 |
|
Step 2: Connect the grey clips on the corners of the unit, insert the male clip into the female clip and push the two together. This doesn't require much force and should click when they're connected securely. Repeat this step for all 4 corners only. |
 |
|
Step 3: With the unit laid out take note of which side is the bottom. This is discernible by the black screw-in feet. The feet can be tightened or loosed to even the balance of the Fabric PullUp if the floor is uneven. |
 |
|
Step 4: Lay your graphic over the unit - it doesn't need to be perfect - with the bottom of the graphic at the end with the feet. |
 |
|
Step 5: Starting in one corner connect the velcro loop sewn onto the graphic, to the velcro hook attached the unit. The graphic should wrap around the side of the unit and slight tuck across the back (10 - 20mm). |
 |
|
Step 6: Proceed to lay the graphic's velcro over the unit's velcro, try to line the edges up so that none of the unit's velcro is visible. Use one hand to hold the graphic taut and the other to smooth the graphic down onto the unit. Note: "taut" is not "tight". The aim is to provide enough tension to remove any wrinkles from the graphic but we're not looking to actually stretch it. |
 |
|
Step 7: Repeat Step 5 for the opposite corner and there you have it! One side is complete.
|
 |
|
Step 8: To complete the top repeat Steps 5 - 7.
*Note: while two people can do this very quickly it's often better to have a single person do this task. As they will know or have a 'feel' for how much tension they used when attaching the graphic; even tension = a better looking finished product! |
 |
|
Step 9: Attach the velcro on the wings / side panels to the unit. And the last step is to connect the remaining clips! This final step will extend the unit to its full size and pull the graphic to a snug fit. Your BANNERAD™ Fabric PopUp Wall has been assembled. |
 |

Collapsing the Unit (with graphic attached)
While this is straight forward there are a few key points which must to be observed. Failure to do so will (and has, many times) resulted in severe damage to the hardware.
|
Step 1: Remove the graphic from the wings, so only the top and bottom of the graphic are still attached to the unit's velcro. |
 |
|
Step 2: Unclip ALL the connectors. Due to the tension on the frame from the graphic, the connectors may pop out when released, However this is not the case for all units. Once all the clips are released the unit should naturally want to collapse on itself. Don't let it do this. Instead guide it down gently. |
 |
|
PLEASE BE AWARE: If you think you have undone all the clips and the unit is still standing - DOUBLE CHECK THAT ALL THE CLIPS ARE UNDONE. We cannot stress this enough. Forcing the frame down will bend or snap the aluminium and possibly damage the clips. This will require the unit to be sent back to us for repairs. *Note: as with Step 1 if you're collapsing the frame on carpet the velcro on the bottom feet could also be preventing the unit from collapsing. |
 |
 Posted by
William Qian
Posted by
William Qian
William Qian is a Specialist in Exhibition Graphics & Displays, and founder of ADI Displays with a vision in taking creativity through to visual reality.
From humble beginnings, he adopted the latest digital printing technology of its time, producing large format digital printing used for exhibition graphics and portable display systems.
With his love of the creative visual industry, he has established BANNERAD™ Range of Products to accommodate the growing needs of portable display solutions which have been successfully distributed in the sign and display industries.
“It is our focus and innovation that allows our continued success in meeting our customers’ display needs concerning application, preference and budget.”